Showing posts with label Christmas. Show all posts

Tuesday, December 26, 2017

Cheery Lynn Feliz Navidad


Good morning!  I made a number of gift tags this Christmas.  This was quick to construct but with the colors and gorgeous font of the Feliz Navidad die, it dresses up simple gifts perfectly.  The holly is part of the same die set and with a little bending of the edges of the leaves the leaves really spring to life.  I popped the circle up using foam adhesive for extra dimension and added snowflakes and red pearls for holly berries.  


Cheery Lynn Dies

Thank you for stopping by the blog today.  Happy New Year!
Hugs, Jenny


Tuesday, December 5, 2017

Cheery Lynn Flower Power Blog Hop!


Hi friends, it's Blog Hop time again and this month we're showcasing flowers! There are so many gorgeous projects in this Cheery Lynn Designs Hop, so make sure to click the links below to see them all.  If you arrived from Debbie's blog you are on the right track. If not, you can return to the Cheery Lynn blog HERE and start from the beginning.  


I use these poinsettia flowers so much but wanted to show them off in white.  I tend to use traditional colors on holiday cards but I thought I would do something different. I found this background paper and it was a perfect excuse to use purple.  I hope you like the result.  I added a glitter snow paste to the flowers and cut the Merry Christmas twice and over-layed the green die cut over the purple so the swirls and flourishes would be green.  


Cheery Lynn Dies Used
Thanks so much for joining me here on the hop! Your next stop is Amy's Blog. Don't forget to leave a comment on the main Cheery Lynn Designs Blog for a chance to win $20 towards Cheery Lynn Designs goodies!  

Sunday, November 26, 2017

Cheery Lynn Hugs & Mugs


Hi friends, I hope you are enjoying the weekend!  Now that Thanksgiving has passed, my children have been asking for hot chocolate and cookies.  We're working on holiday decorating and these dies popped out at me while I was figuring out what to create.  


I backed the gingerbread cookies with white paper, used two different colors behind the mug and popped up all three using dimensional foam tape.  I added a few clear rhinestones on the centers of the snowflakes and glitter glue on the words.  

Cheery Lynn Dies

Thanks for stopping by the blog today!

Monday, October 16, 2017

Cheery Lynn Baby It's Cold Outside Blog Hop


Hi friends,  it's Blog Hop time again! There are so many awesome projects in this Cheery Lynn Designs Hop, so make sure to click the links below to see them all.  If you arrived from Debbie's blog you are on the right track. If not, you can return to the Cheery Lynn blog HERE and start from the beginning.  


For this card I layered up.  Since I knew I would be using lots of layers I kept the theme simple. Layering two trees together added a nice 3-D effect.  I wasn't originally planning to use glitter paper for this card but it needed a little sparkle.  The tree by itself is incredibly detailed which will be so fun to decorate on a future card. 


Cheery Lynn Dies Used

Thanks so much for joining me here on the hop! Your next stop is Amy's Blog. Don't forget to leave a comment on the main Cheery Lynn Designs Blog for a chance to win $20 towards Cheery Lynn Designs goodies!

Sunday, September 17, 2017

Cheery Lynn Let it Snow


Hello!  I'm back with a card using some Cheery Lynn dies from the latest release.  I just love this new Aspen Forest background die and I think it would be perfect for making quick but detailed Christmas cards.  


 As soon as I saw the new background I wanted to pair it with these deer.  I have a number of deer dies but the Fancy Deer Set is so fun with the whimsical pattern and antlers.  I used the same brown paper for the antlers, background layer and the back of the deer.  The bigger deer is popped up with foam tape for dimension.  Last I double layered the Let It Snow and then added glitter glue for sparkle.  

Cheery Lynn Dies

Thanks for stopping by the blog today.  Make sure to pick up some Cheery Lynn Designs goodies while the sale is still going on and check out the blog hop and comment on the Cheery Lynn Blog for a chance to win $20 of dies.

Monday, August 28, 2017

Cheery Lynn Fall & WInter New Release Blog Hop!


Hi and welcome to the Cheery Lynn Fall& Winter New Release Blog Hop! I'm so excited to show you one of Cheery Lynn's adorable new Winter dies! If you arrived from Debbie's blog you are on the right track. If not, you can return to Cheery Lynn's blog HERE and start from the beginning. Make sure to answer the questions on the Cheery Lynn Blog for a chance to win a $20 gift certificate.


These elves are probably my favorite die from this new release.  They can be used as Santas, elves or a mixture.  They feel folk-artish to me and remind me of a santa gnome I bought last Christmas.  They were so much fun to cut with different patterned papers.  They'd be cute in an ornament with fake snow and because of their shape they'd probably be easy to bend and slip into a glass ball. I may try that next.


 I used the circle dies to layer colors on the inside mat.  The Happy Winter sentiment was the right size and the right font.  Last I added rhinestones to belts and bows and Snow-tex to the big elf's beard.  I wasn't sure I'd like the look and had a second beard left over so I added the dimensional paste and then glued the beard.  


Cheery Lynn Dies

Santa & Elf (NEW)
Winter Holiday Word Set B834
Circle Stitch & Cut Tool LG LSC4
Circle Classic LG Stackers Nesting Set XL4

Thanks so much for joining me here on the hop! Your next stop is Amy's Blog. Don't forget to leave a comment on the main Cheery Lynn Designs Blog for a chance to win $20 towards Cheery Lynn Designs goodies!

Cheery Lynn Designs Blog Hop

Friday, December 16, 2016

Cheery Lynn Joy to the World

 Hello friends!  It's that time of year again and for the first time this season there was snow on the ground this morning where I live in NY.  I planned to make a Christmas tag, but the result ended up being snowier than I'd expected. 


I began with a tag from my stash.  I glued Bo Bunny paper to the tag and then cut the edges.  The purple strip at the bottom is a coordinating paper from the same pack.  Joy to The World was cut using the same purple design paper.  The smallest snowflake from Snowflake Set 2 was cut with another design from the pad.  I wanted the Fancy Reindeer to stand out so he was cut out of metallic paper.  The edges of the large Snowflake Delight 2 were lightly colored with distress ink. I positioned the different elements and glued everything down, sprinkling rhinestones around the snowflakes and wiping on a glittery paste on the sides to resemble a dusting of snow.


Cheery Lynn Dies

I want to wish everyone a very Happy Holidays and don't forget to join in the latest Red & Green Challenge for a chance to win a $20 gift certificate to Cheery Lynn Designs!

Tuesday, December 6, 2016

Cheery Lynn Merry Christmas!


Hi friends!  I have a Christmas card to share today.  I was inspired by this beautiful Merry Christmas die.  It's large and needed a large card to show it off well.  I used a classic red and green color scheme and cut the Poinsettias out of a patterned paper from an old Christmas stack.  


I began by layering another patterned paper on top of a 5.5" white card base.  Then I added a white mat before gluing the Merry Christmas, Holly Lace Flourish  dies and Poinsettias.  I cut the poinsettia strip die twice to get enough for the arrangement I wanted.  The Holly die was also cut twice out of a dark green textured card stock.  


Last I added pearl centers to the flowers and a glitter paste.  I also sprinkled dry glitter over the paste while it was still wet because it's a new supply for me and I wasn't sure it would be sparkly or white enough.  As one of my DT sisters recently said it's the season of glitter and I don't think you can go overboard during the holidays.  I sprinkled some white Frantage embossing powder in the corners for a little extra interest.  

Cheery Lynn Dies

Thanks for stopping by the blog today and make sure to join in the current Sparkle and Shine challenge for a chance to win a $20 gift certificate to Cheery Lynn Designs.    

Wednesday, November 16, 2016

Cheery Lynn Christmas Arrangement


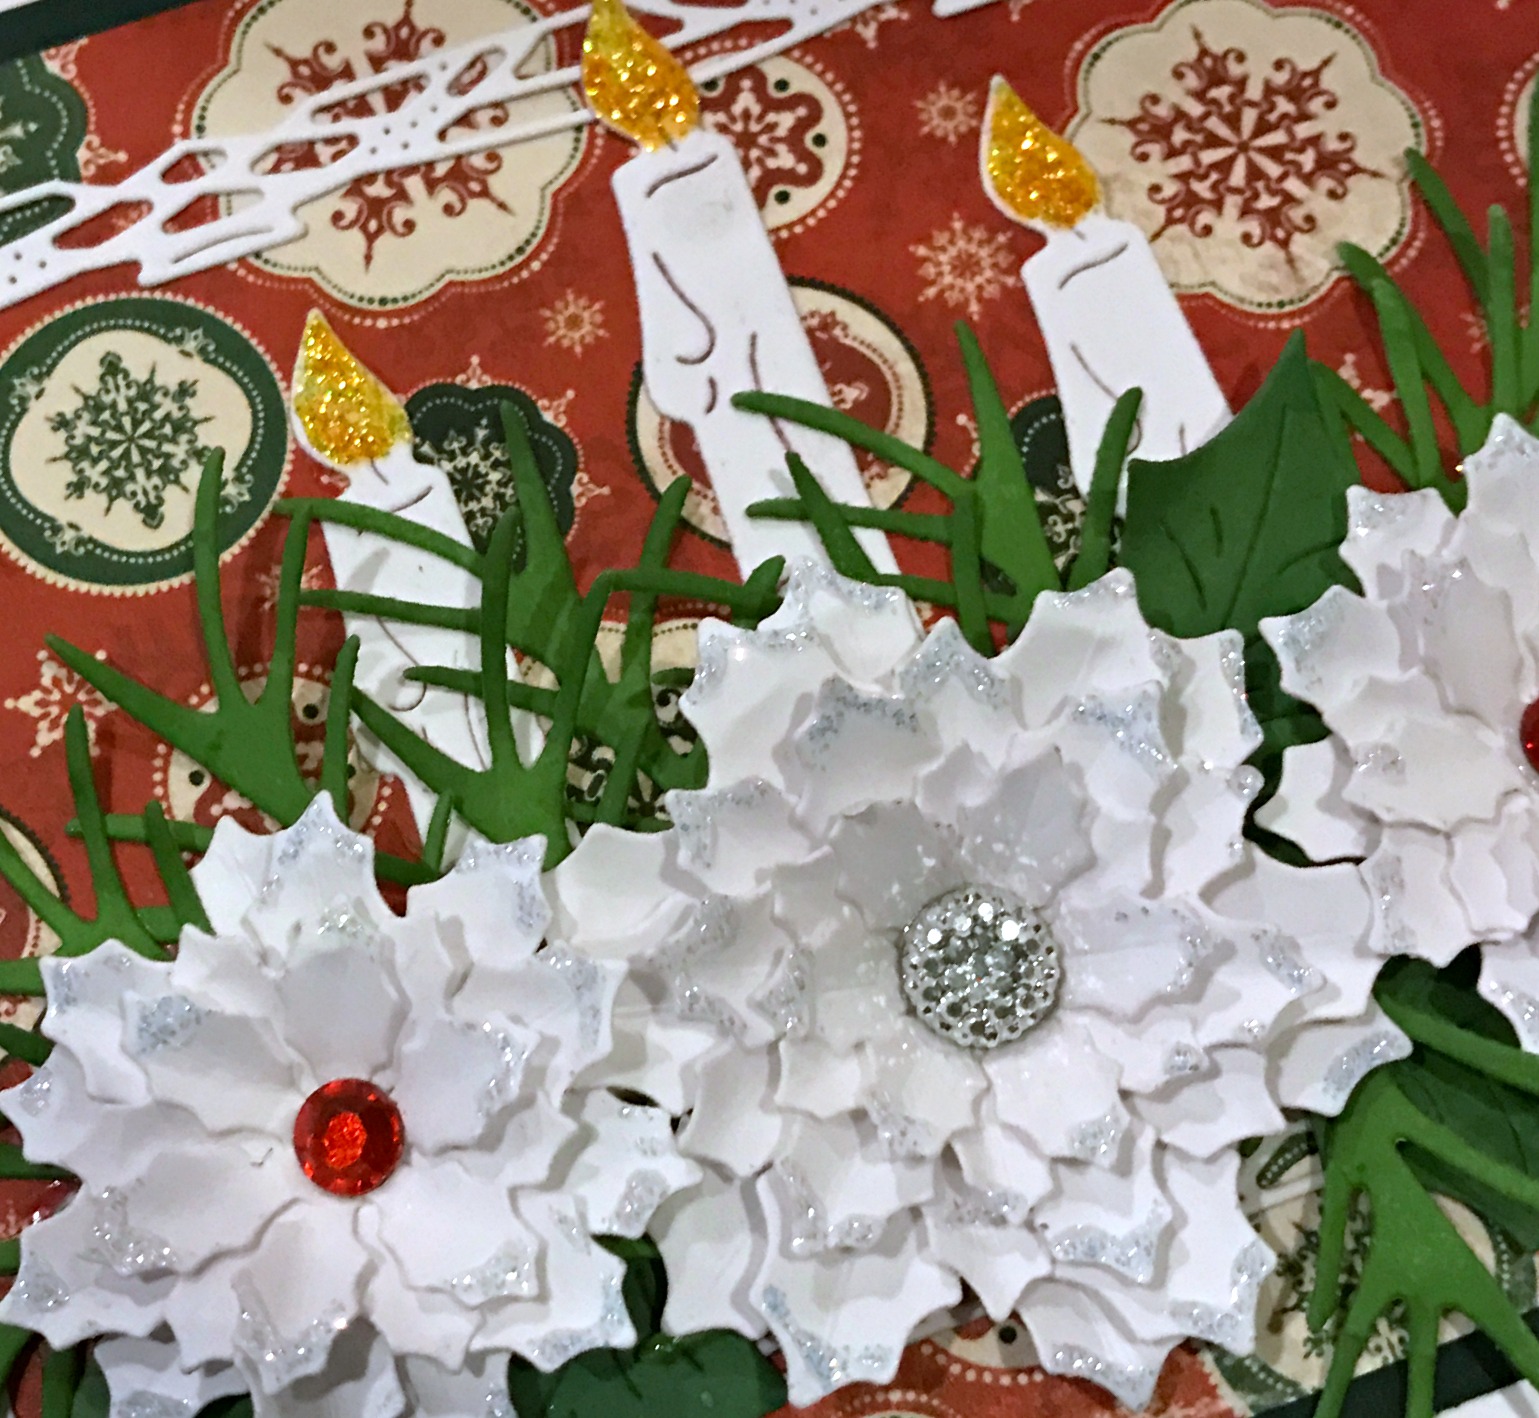
Hi, today I'm sharing a Christmas card I created with some new-for-me dies.  I saw a card online that inspired me and I knew I needed to find a candle die so I could make a Christmas floral arrangement.  Cheery Lynn had the perfect candle die!


I cut the candle three times using white paper.  I used a combination of yellow and orange glitter glue to create the glittery flames.  The frame is a new die for me too.  It comes in a set and makes such a delicate addition to this card.  I wanted the card to feel as though the flowers were almost popping through a picture frame, bringing a Christmas painting to life.  I'm not sure I managed that look exactly but I think I'll be using this frame die often in future projects. 

 I created the flowers using the poinsettia die.  The holly leaves came from the Holly Leaves die and the pine branches are the larger two branches from the Pine Branches die set.  

Cheery Lynn Dies

Thanks for stopping by the blog today and make sure to join in the latest Cheery Lynn Challenge for a chance to win a $20 gift card to Cheery Lynn Designs!

Friday, October 21, 2016

Cheery Lynn Christmas Shaker

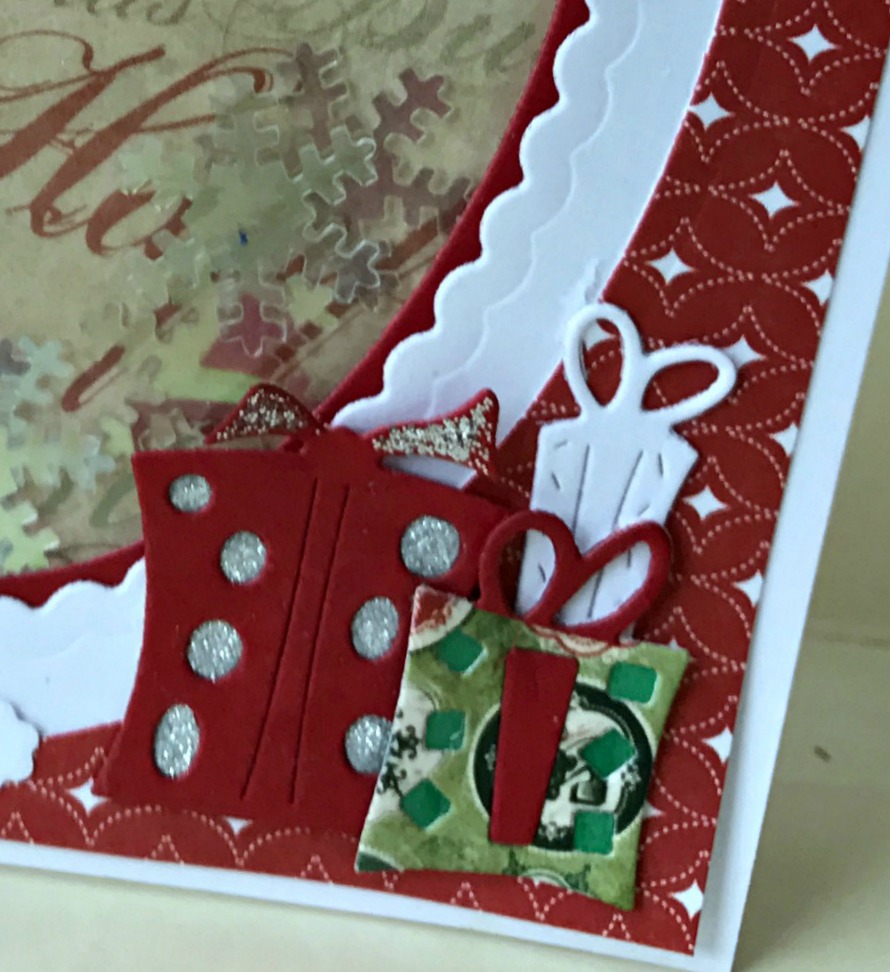
Hello!  It's Jenny here today sharing a Christmas shaker card. I had an idea that I wanted to use the Inverted Scallop Oval Stackers and this card developed from there.  


I started by cutting a Inverted Scallop Oval  into a white A2 top-fold card.  I then cut a piece of red card stock with a smaller oval from the Classic Silver Large Oval set so the red would show through behind the white.  I then glued a piece of Clear Acetate from the new kits and put foam tape behind it.  I trapped sparkly snowflakes in the oval window before sealing the back with tan patterned paper.


The white card front seemed too plain so I trimmed red patterned card stock to 1/4 inch smaller than the A2 card front and cut the center out with a large oval.  The card front is decorated with a tree from the Build a Christmas Tree set and presents from the Whimsical Christmas set.


Cheery Lynn Dies

Thanks for stopping by the blog today and make sure to join in the current Halloween challenge for a chance to win a $20 gift certificate to Cheer Lynn Designs.

Sunday, July 24, 2016

Cheery Lynn Fall & Winter New Release: Christmas & Winter


Hi friends!  Today I'm here with a card showcasing two new dies from Cheery Lynn's New Fall and Winter Release. Be sure to join us every day on the Cheery Lynn BLOG from July 22nd to August 3rd to see all the wonderful July Holiday new release dies.  One random commenter during the promotion will win a $20 gift certificate so comment each day for the best chance to win.


For this card I cut two Christmas Wreaths out of white card stock.  I colored it green with a sponge makeup applicator and distress ink.  I used red stickles to create berries.  Once the glitter glue dried I molded the leaves with a stylus tool.  The bow was also cut twice and molded the same way.  The bells were covered in gold embossing powder and then I drew a glitter line along the accent on each bell.


I glued the two wreath layers down to a card face cut using the Royal Scandinavian A2 Card Facer.  The bells were adhered with foam adhesive and I glued in the Merry Christmas sentiment from the Winter Holiday Word Set.  The back of the card facer was layered with a green rectangle and then an A2 sized rectangle behind so the interior of the card is nicely finished.


Cheery Lynn Dies
Christmas Wreath B839 (New)
Winter Holiday Word Set B834 (New)
Royal Scandinavian A2 Card Facer

Thanks for joining me here today.  Don't forget to stop back  on the Cheery Lynn Blog tomorrow and leave a comment  daily from July 22nd to August 3rd for a chance to win a $20 gift certificate.  Stop over each day and comment for the best chance to win! Also join in the current Christmas in July challenge.

Thursday, December 24, 2015

Cheery Lynn Christmas Joy


Hi everyone!  I'm here on Christmas Eve wishing everyone a wonderful holiday!  For this card I used the Build a Christmas Tree die to create the decorated tree.  The tree part of the die comes in four pieces.  This tree looks like there was a lot of work involved but there really wasn't, this die made it so quick and simple.  The die cuts the main tree and three extra branch pieces to layer to create a fuller dimensional tree in one pass through my die cutting msachine.  It also comes with all the little candy canes, star, ornaments and tree skirt.  I used glitter glue on all the ornaments and star for sparkle.  I used a marker to add stripes to the candy canes.


The Joy sentiment comes from the Joy to the World Wreath and the corner is one of the three corners in the Lace Corner Deco I set.  I cut the center point off of it.  The scalloped edge die is the largest dies from the A2 Frames Rectangular Scalloped Set and the white oval was cut with the Oval Classic Silver Stackers set.


Cheery Lynn Dies Used

Thanks for visiting today and I hope you have a chance to join in the Thank You challenge this week for a chance to win $20 towards shopping at Cheery Lynn Designs.  Merry Christmas!

Thursday, December 10, 2015

Cheery Lynn Christmas Cardinal


Hi, I'm back sharing a Christmas card inspired by this week's Cheery Lynn Designs challenge.  I began by layering the Horizon Square Boutique Stacker Frames in red on top of a 5.5 inch square card.  I took a smaller white piece of card stock and distressed the edges before layering a piece of design paper cut with the French Flair Boutique Stacker on top. 


I thought the Fancy Bird House decorated in red and green would make a cute holiday home for thie Cardinal from the Feathered Friends set.  I cut the birdhouse using kraft paper and then glued different colored papers to the back to add the detail I wanted.  I also double cut the fence and layered the white fence on top of the kraft base.  The snow is texture paste and then I also added sparkle by adding a glitter paste on top.  I used two layers of the Holly Lace Flourish for greenery and added a snowflake from the Snowflake Set #2.

Cheery Lynn Dies

Thanks for looking and make sure to join in this week's challenge for a chance to win a $20 shopping spree to the Cheery Lynn Designs shop!

Challenges Entered
Cardz 4 Galz Cute Christmas
CRAFT Challenge Christmas
Cute Card Thursday Add Some Glitter

Thursday, December 3, 2015

Cheery Lynn Tropical Christmas


Hello and happy Thursday!  I'm hosting the Cheery Lynn Blog today with this new card inspired by the current CLD challenge, Non-Traditional Christmas Colors as well as the song Mele Kalikimaka which I can't seem to get out of my head lately.  :)  I thought some of the new travel dies from CLD latest release would be perfect for a tropical themed Christmas card.  I started by using the Circle Stitch & Cut Tool set to cut a large circle.  The center was then cut using a smaller die from the Circle Stitch & Cut Tool set to create the pink ring.  A piece of plastic toy packaging was then glued to the back of the ring to create the window.


The palm tree and surfboard are from the newly released Surf's Up die set.  They are hidden but I also added a couple of the grass clumps set on the ground. To finish off the scene I added a small stitched circle for the sun.  I then sprinkled iridescent fake snow on top of the little scene and trapped the snow by putting a layer of double sided foam adhesive all around the ring.


I hope you like the result.  I love making little scenes on cards and with the bright colors this was a fun one to create.  

Cheery Lynn Dies

Thanks for stopping by the blog today and make sure to join in this week's Non-Traditional Christmas Colors challenge for a chance to win a $20 shopping spree at Cheery Lynn Designs!

Tuesday, December 1, 2015

Dies R Us Gold Christmas

Dies R Us Dies

Good Morning!  I'm back today sharing a new card inspired by the new challenge starting today at the Dies R Us Challenge Blog.  The theme is Christmas.  I was inspired by White Christmas but I ended up adding in some gold.  I guess my card is more of a monochromatic Christmas.  

I began with a cream 5.5 inch card and then layered a piece of design paper on top.  I cut a large circle out of the design paper with a Cheery Lynn Circle Stacker Set.  Then I glued a white scalloped ring to the front of the design paper.  I used the Cheery Lynn Horizon Boutique Circle and then cut the center out with the same circle from the Circle Stacker Set to form the ring.  

Before gluing down the design paper I played around with my Winter Neighborhood Border that I cut with a gold glitter paper.  I positioned it so all three houses would show through.  I cut a rounded piece of the same glitter paper and glued it in front of the border strip so the houses could be centered in the circle.  

Last to add a little more glitz I used a snowflake from the Cheery Lynn Snowflake Set 2 and glued it on top.  This kind of design would work well as a shaker card too but I was afraid the plastic would obscure the sparkle of the glitter paper.  

Thanks for stopping by today and make sure to submit your holiday project to the new Christmas challenge at Dies R Us for a chance to win a gift card to the store!

Thursday, November 19, 2015

Cheery Lynn Joy to the World


 Hi, I'm hosting the Cheery Lynn blog today with a new Christmas card.  I love this adorable reindeer die and thought it was the perfect time to try it out.  The details on it are wonderful and it doesn't need a lot of embellishment to really make a statement.  This card was quick enough to make that it could probably be replicated for Christmas cards.    


I first cut the Deutschland Boutique Stacker out of white cardstock and glued it to a green A2 sized card.  I then layered the second largest of the Royal Scandinavian Boutique Stacker Frames on top that was cut with kraft card stock.  I cut the Joy to the World die a couple of times to get the wreath green and the center dies (which I didn't cut out) cut with white and red paper to layer the Joy word on top.


Cheery Lynn Dies
Royal Scandinavian Boutique Stacker A2 Frame DL232

Thanks for stopping by today and don't forget to check out this week's Tag You're It challenge for a chance to win a $20 voucher to the Cheery Lynn Store!


Wednesday, September 23, 2015

Classy Cards Winter Shaker

Hello!  I'm sharing a shaker card today inspired by this week's challenge at Classy Cards 'n Such.  Pop on over and join in the fun, there's still time!


I started with a white side fold A2 card base.  I layered a piece of Kraft paper 1/8 inch smaller on all sides on top.  I then cut a smaller blue layer.  I cut the middle out with an oval die from my stash.  I glued the Memory Box Deer in Trees die to the underside of the blue layer and then glued a piece of clear plastic toy packaging on top.  I made an oval around the opening with thick foam adhesive from my stash.  I cut another Memory Box Deer in Trees and cut the deer off the die cut, I then also cut the bottom of the trees.  I glued the trees down to the Kraft paper.  I then sprinkled some chunky glitter to the center of the Kraft paper before removing the backing on the foam adhesive and laying it on top so the adhesive formed a little ring around the glitter.

Thanks so much for visiting and don't forget about joining our challenge this week!

Supplies


Thursday, September 10, 2015

Cheery Lynn Poinsettia


Hello!  It's Jenny today sharing a Christmas card I made.  The 3D Poinsetta die from the latest Cheery Lynn Designs release is so detailed and I love the way you can pop up the center flower.  It adds so much interest to a project.  It would be perfect to add to a gift bag too.  Just add some ribbon or flourishes like I did on this card and you're done.  

I began by cutting out red and patterned card stock using the A2 Frames Rectangular Scalloped set.   Then I cut two of the Holly Lace Flourish and colored them green with distress ink.  The red bow is from the Sweet Candy Cane die.  I cut the bow off the cane.  It was simple to do because of the added detail in the die.  I cut it twice and off set it a little so the white bow would show up and give it a shadow effect.  


The 3D Poinsetta was cut using white card stock and colored with red distress ink.  I glued flat back cream colored pearls to the center.  

Dies

Thanks for visiting and I hope you can join in this week's challenge for a chance to win $20 towards shopping at Cheery Lynn!

Thursday, July 30, 2015

Cheery Lynn Gingerbread Christmas


 Hello! I'm sharing a Christmas card in July today for Cheery Lynn Designs!  It's 90 degrees in NY today but I wanted to play with this adorable Gingerbread Family  die.


The card base is a green A2 card.  I cut a piece of patterned card stock slightly smaller to layer on top. Then I cut three gingerbread men out of a creamy gray paper. I glued white card stock to the backs so the eyes and buttons would look like they were made with white icing.  A little distress ink was sponged around the edges and I added red pearls for buttons and the center of the bow.


The circle was cut with the new Circle Stitch & Cut Tool.  Merry Christmas is a Crafty Ann die, I just love this vintage font. Cheery Lynn is now carrying all the Crafty Ann dies.  You can see them all HERE.  Last I added the snowflake from the Snowflake Set 2 and glued a sparkly silver embellishment to the center.

Thanks for visting and make sure you link up a card to join in this week's Anything Goes Challenge!  Hugs, Jenny

Challenge Entered
Send a Smile 4 Kids Christmas 4 Kids