Wednesday, December 31, 2014

Jen's Paper Obsession: Best Projects of 2014

I thought I'd post my top twelve favorite cards from the past year (oldest to newest).  Wishing you health and happiness and I hope 2015 is the best yet!  


Last but not least, here's my favorite non-card project of 2014.


Thanks for visiting today and scrolling down this far! I wish you a very Happy New Year filled with wonderful things and much crafting.

Hugs,
Jenny

Tuesday, December 30, 2014

IO Partridge Tag

I made this for the quick holiday gifts challenge at Impression Obsession.  I thought it would be a nice addition to a cookies, chocolates, a candle or even tied to a bottle of wine. It's sparkly rustic.  :)


I sprayed the tag with Cork Glimmer Mist and then wiped over it with a baby wipe to even out the spray. The background has a subtle shimmer.  

I stamped the two Impression Obsession stamps with Memento black ink and then colored over parts of the tree with copics.  I stamped the partridge on another sheet of paper, cut and colored him, popped him up with foam tape and added sparkle with a Wink of Stella pen.  I also added Wink of Stella to the stars and bow.


Last, I used clear and white dimensional sprays and added a little distress ink to the edges. Thanks for stopping by & Happy New Year!

Supplies
Copics, dimensional spray, ribbon, twine, Wink of Stella Clear Brush

Challenges Entered:
Impression Obsession Quick Holiday Gifts
Flonzcraft A Christmas Song
Loves Rubberstamps Something Old (partridge stamp), Something new (dimensional sprays)

Classy Cards Winter Blooms

Hi!  Have you seen the new Time for a "New Year" Challenge inspiration photo at Classy Cards 'n Such?  I was so inspired to re-create my version of the beautiful photo while using something new.


I cut the Memory Box Vintage Apothacary Jar die with white card stock, covered it with versamark ink and Frantage embossing powder and heated with a heat tool.  I embossed the vase three times sprinkling and blending different colors of the Frantage embossing powder.  I tried to really coat the paper to make the jar look like mercury glass. After I achieved the color combination I wanted, I added a thick layer of distress rock candy crackle paint over the Frantage layer.  The jar die cut turned out quite thick and sparkly and looks like cracked glass.


While the jar was drying I cut branches using two different Memory Box dies.  I colored them with distress ink and added a bit of the crackle paint to the edges to resemble ice.  I also added a bit of clear stickles.  

The snowflakes were cut using the Impression Obsession Small Snowflakes die.  They were cut from a pretty blue paper that picked up the color of the blue glitter in the Frantage Embossing powder.  I used the two smallest snowflakes in the set and covered the snowflakes in clear stickles. After gluing down the snowflakes, I added different colors and sizes of rhinestones and Baby Pearls to the branches to mimic the ornaments in the inspiration photo.


Last (but I really should have done this first), I sprayed my brand new Irresistible white dimensional spray around the arrangement, making sure to cover the stacked blue and brown card stock layers on the sides.  I wanted to make a clean and simple card but without the dots of spray, the card seemed to need something else.  The spray added a little dimension and interest and the little white dots almost look like shiny snow falling.

I used Joy Foam Pads to attach the vase to the paper and again on the back of the top card layer to give the card more dimension.

I can't wait to see the new products you use for the latest CCNS challenge.  Remember, you can get 10% off your Classy Cards 'n Such purchase if you use coupon Jenny-10.  Thanks for looking!

Supplies

Monday, December 29, 2014

Cheery Lynn Thanks

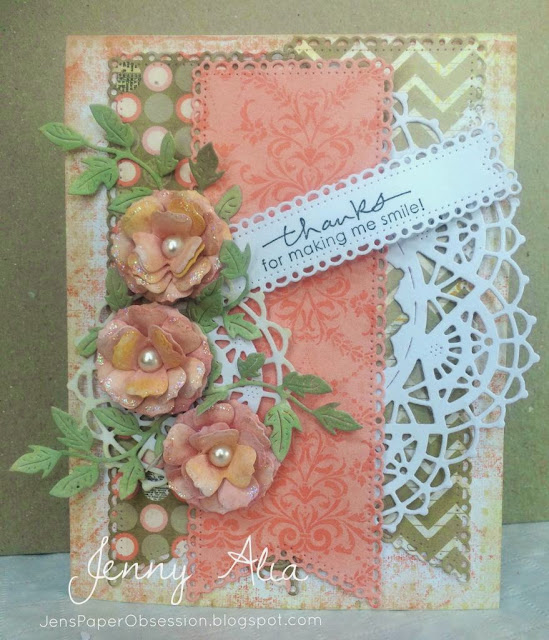
This card was inspired by a CAS style card with three fishtail banners I saw on Pinterest.  It had no flowers, doilies, etc but I loved what it did have:  banners and pretty paper.   I grabbed a Bo Bunny paper pad out of my stash, threw in some dies, whipped up some paper flowers, and this is the result.


I'm always amazed how well Cheery Lynn's detailed dies cut so beautifully without adding a layer of wax paper or shims I sometimes have to add to other intricate dies.  They always cut card stock perfectly in my Big Shot.

The Classy Cards 'n Such store still has some great Cheery Lynn dies available at 50% off with coupon code CLD!  Here's a close-up of the Gardenias on the center of the Nautical Wheeler Doily:


Supplies
Cheery Lynn Flourish Leaf Strip
Cheery Lynn Gardenia Small 
Cheery Lynn Horizon Fishtail Banners
SU - Thanks Stamp
Impression Obsession CAC Distressed Dots
Impression Obsession CAC Grunge
Bo Bunny Paper Pad - The Avenues
Stickles, Distress Ink, Glimmer Mist - Silk, Flat-back Pearls

Thanks for stopping by!

Challenges Entered
Cheery Lynn Thank You
Artistic Inspirations Favorite 2014

Saturday, December 27, 2014

Classy Cards Baby Shower

Hi, I made this for my friend to give at a shower.  The invitation was blue and brown so I tried to use those colors.  


I cut the umbrella from an old Quickutz die with a scrap of Authentique paper I had in my stash.  The new Spellbinders Umbrella Trio die would work well too.  I added rhinestones to the centers of the stars on the umbrella.  

I cut a white oval using the new Spellbinders Oval Bliss die and then sponged Antique Linen distress ink onto it using the die as a stencil. The yellow dotted paper is from an older 12x12 DCWV paper pad.  Once I liked the shading on the circle, I adhered the umbrella using Joy! Foam pads.  I doubled up the pads on the center of the umbrella to add more dimension and give a rounded appearance to the die.  The sides are also popped with Joy! Foam Pads but I didn't add an extra layer so the sides would sit closer to the paper.

For the brown layer I cut a piece of Kraft card stock but then decided I wanted something a little darker so I brushed distress ink around the edges to darken the Kraft paper before I glued the layers together.  I added a baby stamp from my stash, a bow with a small button and voila!  This was a quick card if you need something for a shower in a snap.

Thanks for stopping by!

Supplies

Tuesday, December 23, 2014

Magnolia Dream Big

Welcome to my blog today!  I was playing around with my new Magnolia stamp and this is the result.


The Magnolia Doohickys flowers were cut from red card stock that I'd stamped and embossed with  a clear glitter embossing powder.   Not sure it's visible in the photograph but they have a nice sheen.  I colored the edges of the white Cheery Lynn flowers with distress ink and then applied stickles to the edges.  The Cheery Lynn Dream Big die cut was embossed with gold Frantage powder and the Frantic Stamper Musical Score was embossed with shabby white Frantage powder.

Thanks for visiting!

Supplies
Magnolia Viking Tilda Stamp
Impression Obsession CAC Paisley
Cheery Lynn Dream Big Phrases
Cheery Lynn Nautical Wheeler Doily
Cheery Lynn Small Lollipop Cutie Fringe 1
Cheery Lynn Cutie Fringe 3
Frantic Stamper Musical Score
Magnolia Doohicky's Flowers
Frantage Embossing Powder
Smooch Paint - Gold Lame
Flat-back pearls
Distress Ink
Copics

Challenges Entered
Cheery Lynn Anything Goes
Kraftin Kimmie Sing Me A Song
Tilda's Town Happy Holidays
Totally Tilda Anything Goes
Magnolia-licious Anything Goes
Simply Magnolia Anything Goes
Flonz Craft A Christmas Song
Stamp & Create Christmas

Friday, December 19, 2014

Cheery Lynn Seasons Greetings

Hello!  I made this card for my daughter's teacher.  This Cheery Lynn Italian Flourish doily was left over from another project.  I pulled out some designer paper, made flowers with the Cheery Lynn Gardenia Small die, added the Cheery Lynn Holly Flourish and voila!  This card came together in a snap.


I love how the Cheery Lynn Gardenia die strip cuts enough for a whole flower in one pass through my big shot.  Here's a closeup.  I added stickles to the edges for sparkle.


Thanks for stopping by and Happy Holidays!

Supplies
Season's Greetings Stamp
Cheery Lynn Italian Flourish
Cheery Lynn Gardenia Small
Cheery Lynn Holly Flourish
Kraft Card Stock
Flat-back pearls, rhinestones, stickles
Red Embossing Powder

Challenges Entered
Cheery Lynn Designs Sparkle & Shine
Scrapyland  Holidays
Card Mania Christmas
Crafty Cardmakers Christmas

Monday, December 15, 2014

Classy Cards Christmas Stockings

Hello! I created this card for the Stockings Were Hung challenge at Classy Cards 'n Such.  Come and join in this week for a chance to earn a great prize!


I first cut the Poppystamps Grand Madison Fireplace out of heavy white card stock.  I tried to age the mantel by adding Pumice Stone and Antique Linen distress ink over the embossed areas with my finger.  The result looked a little too shabby, so I painted over the mantel with Picket Fence Distress Stain to even out the tones.  It added a painted look to the mantel which was an added bonus.

I cut the Stocking Garland with red card stock and then cut the tops a second time using white card stock.  I cut the white tops twice, stacked them to add dimension, and then painted them with a Viva Decor Cream Pen to add a little shimmer and texture.

The Pine Garland was colored with green distress ink.  The red pattered paper is from Bo Bunny and was layered onto a piece of Kraft paper.

I added a small piece of dark brown card stock behind the fire and a narrow strip of green at the bottom for the hearth.  The Poppystamps Fireplace Logs and Poppystamps Warm and Cozy Fire were also colored with distress ink. The detail on the logs is amazing.  I can't wait to use it for a camping themed name frame for my son.

I cut the Poppystamps Frozen Flakes border out of Kraft paper too.  I almost always cut snowflakes in white but white snowflakes seemed to add too much contrast.

Thanks for visiting and remember you can save 10% off your entire order at the Classy Cards 'n Such shop using coupon code JENNY-10.

Supply List
PoppyStamps Pine Garland
Poppystamps Frozen Flakes
Bo Bunny Cardstock
Viva Decor Pearl Pen Cream

Challenges Entered
Simon Says Stamp Monday Challenge Anything Goes
Come and Get It Merry Christmas
Artistic Inspirations Merry Christmas
Card Mania Christmas
Craft-dee Bowz Anything with a handmade bow
Crafty Cardmakers Christmas
Dream Valley Christmas
Simon Says Stamp Wednesday Winter Inspiration
Poppystamps Sparkle & Shine

Friday, December 12, 2014

Classy Cards Peaceful Snowflakes

Hi friends! I have seen so many cards lately with beautiful sparkly snow drifts and I wanted to try my own.  I decided to keep things clean and simple.


This came together so quickly, I could probably make more for Christmas.  I first cut a piece of Kraft Card Stock smaller than the A2 base card.  I typically cut my layers  in 1/4 inch increments.  I cut blue piece larger because I wanted only a tiny border of Kraft peeking through.  I cut a piece of white card stock to the size of the blue layer, then ripped the white piece it in half, making sure to leave the rough side facing out.  I then layered and glued the two pieces together to the blue layer.

I cut the Impression Obsession Deer and Peace sentiment out of Kraft Card Stock, and cut the Impression Obsession Small Snowflakes out of white.  I tucked the deer in between the white layers before the glue binding them completely dried.

To finish up, I coated the snowflakes and snow drift edges with stickles and added small rhinestones to the center of the snowflakes.

Thanks for stopping by my blog today!

Supplies
Rhinestones
Stickles

Challenges Entered
Impression Obsession  Clean & Simple Holiday Cards
City Crafter Glittering Snowflakes

Thursday, December 11, 2014

IO Merry & Bright

Hi, I was playing with some of my new Impression Obsession stamps and this is what came together. I added red glitter to the edges of the berries for some holiday sparkle.  It's difficult to see but the button also has an iridescent shimmer.  IRL this card sparkles.


If I were to make this again I might stamp the berries first and create a mask before stamping the pine bough for a crisper image.  Thanks for stopping by!

Supplies
Impression Obsession Pine Trio
Impression Obsession Berry Sprig
Impression Obsession Merry & Bright
Impression Obsession Circle Shaker DIE001-Z
Ribbon & Gold Cord
Button
Red Glitter

Challenge Entered
Impression Obsession Clean & Simple Holiday Cards

Tuesday, December 9, 2014

Classy Cards Folk Christmas

Hello, this is my card for the new Classy Cards 'n Such Wrappings Challenge.  My first thought with the ribbons and wrappings in the inspiration photo was to use this wreath die with a variety of designer papers.


I ended up only using one designer pad but the Authentique Tradition double sided paper pad was enough.  I liked the look of this paper, combined with the Kraft Card Stock the star wreath reminded me of American Folk Art.

I began by cutting the wreath with Kraft Card Stock, then I cut it out a few more times using Authentique Tradition design paper.  I cut up the stars mixing the colors up randomly around the wreath.  I mounted the wreath with Joy! foam pads onto a piece of white card stock I embossed with the Anna Griffin embossing folder.

I then matted the embossed layer onto red and then Kraft Card Stock before gluing it onto the white card front.  I added a bow, a button and twine and then some red stickles on top of some of the stars to blend the bow color better with the wreath.

Thanks for looking!  Remember to use my coupon code JENNY-10 to save 10% off your entire purchase at Classy Cards 'n Such.

Supplies
Authentique Tradition Paper Pad

Challenge Entered
Bunny Zoe Crafts Buttons

Monday, December 8, 2014

Kraftin Kimmie Pirate's Life

Hi friends!  I made this just for fun and I'm not sure who I'm giving it to yet but my seven year old daughter is asking to frame it for her room.  Maybe this sassy pirate is drinking a root beer float?  Cream soda?


The Kraftin' Kimmie rubber stamp comes in a set and is called Bootylicious.  I used liquid applique on her drink and stickles on her head scarf because every card needs a bit of sparkle. :)

Supplies
Kraftin Kimmie Stamps Bootylicious
Impression Obsession Cover a Card Flourishes stamp
MFT Plentiful Petals Die
Cottage Cutz Leaf Die
Spellbinders Captivating Squares
Stickles, liquid applique, gold paint

Thanks for stopping by the blog today!

Challenges Entered
Kraftin' Kimmie Stamps WW Anything Goes
Artistic Inspirations Anything Goes
7 Kids College Fund Challenge Anything Goes #114 (KKS Bootylicious used)
Card Mania Favorite Color Combo (Blue & Pink)
Corrosive Challenges Anything Goes

Saturday, December 6, 2014

House Mouse Blueberry Tart

Hello friends!  I created this card from an image that I colored a while time ago.  It ended up in my scraps pile and I thought it was time to rescue this little guy.  The flowers and most of the elements were also scraps.  This should have come together pretty quickly, but I had to take lots of breaks to run after my youngest.  He's not even two but he really is a menace!


Supplies
La La Land Rolled Roses Set
MFT Layered Rose
Simon Says Stamp Leaf
Cheery Lynn Doily
Technique Tuesday Awesome
Spellbinders Classic Large & Small Circles
Spellbinders Grand Decorative Labels 1
Rhinestones
Copics
Glossy Accents (on the blueberries)

Thanks for looking!

Challenges Entered
House Mouse Challenge Anything Goes/Christmas
Gruffies & Guests Blue & Silver/Anything Goes (there's a little silver on the rhinestone & he's sort of silvery.  :))

Wednesday, December 3, 2014

Kraftin Kimmie Rapunzel

Hi!  I created this as an inspiration card for the new Anything Goes (With a Twist) Challenge at Crafting by Designs. 

I was in a princess mood.  I think Rapunzel may be retired, but there are so many other adorable Kraftin' Kimmie stamps available with new releases monthly.  My wishlist is a mile long, KKS images are always cute, fun and sometimes sassy!  They just announced a guest DT call on the FB Page, and I submitted this card.  I'm keeping my fingers crossed, wish me luck!


This originally began as a tag but things kept changing direction.  There are so many different dies on this card.  I just kept pulling out supplies.  

The MFT layered pink roses were colored with glimmer mist and copics. The Marianne Design purple leaf die cuts were colored with distress ink.  The greenery was cut from green paper with a Penny Black die and sponged with distress ink and the ends colored with gold Smooch paint.

Rapunzel was colored with copics and glittered with clear stickles.  The Die-Namics flourish die was embossed with two types of gold embossing powder.  The Magnolia banner and Sue Wilson French Collection Corner die (under the flowers) were embossed with Frantage embossing powder.

I added some sequins in spots, and voila!  I framed this in my daughter's room.  I had a collection of empty frames and shadowboxes on her wall and figured maybe it was time to fill them before she becomes a teenager. My Kraftin' Kimmie Cinderella Card ended up there too, now I just need to make her one more princess card and her wall will be done. :)

Supplies
Kraftin Kimmie Stamp
Marianne Designs Leaves
Penny Black Nature's Song
La La Land Rolled Roses Set
MFT Die-namics Formal Flourish
MFT Die-namics Layered Rose
Magnolia Event Banners
Sue Wilson French Collection 
Frantage Embossing Powder
Gold Embossing Powder
Copics
Distress Ink
Glimmer Mist
Sequins & Flat-back Pearls

Thanks for looking!

Challenge Entered
Scrapyland #7

Tuesday, December 2, 2014

IO Cheery Poinsettia

Hello, I was playing with some of my Impression Obsession stamps and this is what came together.


Most of my holiday cards seem to have poinsettias on them, I guess I gravitate to them.  The warm and cheery stamp was one of the first stamps I ever purchased.  I love the sentiment and the font.  Since my other post today was a tag using entirely dies and non traditional Christmas colors I thought I'd try something both different and traditional.  The Poinsettia Swirl stamp was stamped with versamark and then heat embossed with green tinsel embossing powder.  It sparkles more in real life.  Thanks for stopping by!

Stamps

Challenges Entered:
Impression Obsession Christmas Greetings
Pink Gem Challenge (ends1/2)
Christmas Card Challenges

Classy Cards Winter Wonderland Tag

Hi friends!  I created this tag for the current Christmas Tags Challenge at the Classy Cards 'n Such blog.  


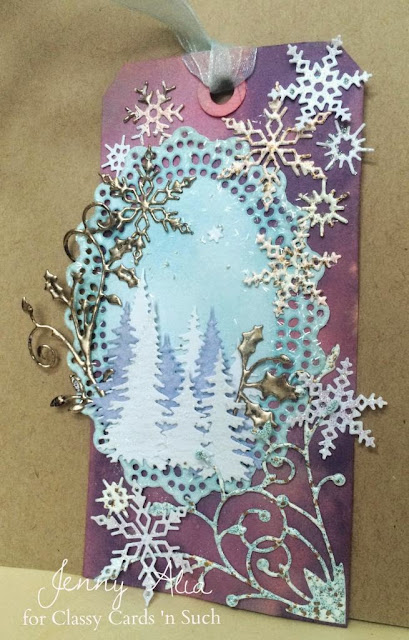
The tag was cut from a manila folder with a Tim Holtz bigz tag die.  I colored the background with cadillac pink glimmer mist and added shaded lilac distress stain and seedless preserves distress ink spray.  More distress spray colors are going on my wish list.  I am having so much fun blending them and they provide great coverage.  

After the background was blended with a water mister, I began working on the other elements.  The main oval is from Marianne Craftables Lacey Oval and Flower die.  I sponged tumbled glass distress ink on the oval to color it blue and added dots of Dreamweaver Pearlescent Embossing Paste to the sky to mimic falling snow.   

The trees were cut from the Impression Obsession Evergreen Trees die.  I cut three sets of trees from white card stock, then colored one set by sponging purple distress ink over it.  I layered and glued the trees in place and then added glue and sprinkled Cloud Nine Microfine glitter on the top trees.  

The snowflakes were cut from Impression Obsession's Small Snowflake die set.  I embossed most using Stampendous Frantage Embossing Powder but some were covered with clear stickles.  This was my first time using Frantage EP.  The effects it creates are amazing.  It covers so well and has such beautiful sparkly bits.  I found it works a little better heated from underneath so the larger pieces don't fly off when hit with the heat tool.  I used Shabby Blue on the corner die cut, Shabby Pink on the snowflakes, and silver on another snowflake also on the Cheery Lynn Holly Lace Flourish die cut that I split into two pieces. To finish, I added a bit of clear tinsel glitter around the outside of the oval.  This card has a lot of sparkle.  My five year old wants me to hang this on our tree this year. Now that's praise!  :)

Thanks for visiting and remember to check out the current CCNS Blog challenge for a chance to win a great prize!  Use coupon code JENNY-10 to save 10% off your entire order at the Classy Cards 'n Such shop.  

Supply List
Stampendous Frantage Embossing Powder
Pearlescent Embossing Paste
Cloud Nine Velvet Microfine Glitter
Stickles
Tumbled Glass Distress Ink
Seedless Preserves Distress Ink Spray
Shaded Lilac Distress Stain
Empty Spritzer Bottle

Challenges Entered
Impression Obsession Christmas Greetings
Cheery Lynn - Tis the Season (Used Holly Flourish die)
All Crafts Challenge Anything but a Card
Card Mania Favorite Color Combo (Blues/Purples)
Craft Hoarders Anonymous Celebrate the Season

Monday, December 1, 2014

Dies R Us Skating Bliss

Good Morning!  I created this card for the new Winter Wonderland Challenge going on at the Dies R Us Challenge Blog.  It's such a fun challenge with a ton of possibilities and I hope you can play along.

Impression Obsession Small Snowflake Set
Spellbinders A2 Devine Eloquence

This was a birthday card I created for my son's friend's birthday.  The little girl had an ice skating party and I immediately thought of this stamp.  I wanted a lacy, frilly card so I pulled out my new Spellbinders die and this card came together in a snap.  

Her dress was colored with copics and the panel underneath was sponged with distress ink.  The Impression Obsession Snowflakes were covered in glitter as is the skater's dress.  I hope you can join this challenge.  

I can't wait to see what Winter Wonderland you create with dies!

Challenge Entered
Craft Hoarders Anonymous Celebrate the Season

Thursday, November 27, 2014

Classy Cards Wedding Wishes

Happy Thanksgiving!  

I created this card for a friend's wedding.  I love the white on white look for cards, they always feel so crisp and fresh.  I recently put together a fall card with a similar design.  I switched out some of the dies and recreated it in white.


I first used the Spellbinders Gold Labels One die on two opposite sides of the 5.5" square front panel. The Spellbinders Botanical Swirls and Accents die could easily be substituted.  I used cryogen white card stock which has a beautiful shimmer.  The card base is cream.  Since the shimmery card stock was actually more cream than the white I typically use for card bases, I thought the cream underneath looked better and set off the other white nicely.

The flowers were cut from the new Heartfelt Creations Arianna Blooms die.  I used both of my McGill Paper Blossoms Tool Kits to form the flowers.  For the largest flower I used all of the die cuts and for the smaller flowers I used multiples of the smaller die cuts.  I glued the layers together and added flat-back pearls to the centers.  I adhered the flowers to the card using Joy! Foam Pads.

The leaves are from a Cheery Lynn Leaf Strip die that's no longer in stock at Classy Cards but there are many beautiful Cheery Lynn dies still available.  Use coupon CLD for 40% off!

The Congrats word is a Penny Black die.  Thanks for looking!

Supplies
Spellbinders Shapeabilities Gold Labels One
Cheery Lynn Leaf Strip

Challenges Entered
Scrapyland Add Texture
Simon Says Stamp Anything Goes
fab n funky Die Cuts
Penny's Challenges Anything Goes
Party time Tuesdays Anything Goes

Monday, November 24, 2014

Classy Cards Bright Christmas

Hello friends, I designed this card for our new Classy Cards 'n Such challenge, Christmas Brights.  To me this challenge meant non-traditional Christmas colors.  I chose pink and blue and added sparkles.  I decorate with more traditional colors but it was a lot of fun to branch out and create something "out-of-the-box" for me.


I began by looking through my non-Christmas designer paper but most of it wasn't as bright as I wanted.  I found this pretty blue polka dot paper in my Basic Grey hey you paper pad.  I cut the Memory Box Addison Ornament out of white card stock and then sponged it with pink distress ink before covering it with pink stickles.  I used the negative from the die cut and pasted the design paper behind it.  After the stickles were dry I glued the Addison Ornament to the blue paper.

I added the sentiment from a clear Hero Arts set I had in my stash using a pink Memento ink.  I then positioned the main panel and attached it to the A2 card base with thin foam tape. The pine bough was cut from Impression Obsession's Pine Branch die.  I covered it with glue and sprinkled Stampendous' Frantage Shaved Ice on top.  I then looped a piece of silver cord through the branch and connected it to the top of the Addison Ornament that I'd covered in platinum stickles.

This project may not be as bright as I had hoped but it really sparkles! I hope you can join us this week, I can't wait to see your creations.  Thanks for stopping by today!

Supplies

Challenge Entered
Scrapyland Add Texture

Thursday, November 20, 2014

Classy Cards Snapdragon Wishes


I needed a quick birthday card for a friend and this is what I created.  I used the Anna Griffin Cherry Blossom Embossing Folder on the background panel to add dimension.  I haven't been using as many of my embossing folders lately, but this one keeps getting pulled out of hiding.  I love the subtle texture it adds to my cards.  It's good for floral backgrounds and would be good for winter scenes too since it almost looks like snowflakes.

I stamped the Stacy Stamps Snapdragons onto white card stock using Memento Tuxedo Black Ink.  I then cut the white panel using Spellbinders A2 Matting Basics A die set.  I colored the flowers with Copic markers and then used clear Stickles to highlight the flowers.  They really sparkle.

Wishes was cut from Kraft Card Stock using the Impression Obsession Greeting Set.  This is a go-to set for me lately, it's perfect for so many occasions.  I'm really hoping IO comes out with more phrases, it's such a pretty font.  I cut the purple mat using the next larger die in the Spelbinders A2 Matting Basics A Set.  I adhered the purple layer using Joy! Foam Pads for dimension.

To finish I wrapped some twine around the main panel.  I liked how the twine coordinated with the Kraft Card Stock adding the perfect touch.  Thanks for looking!

Supplies
Copic Markers

Challenge Entered:
Scrapyland Add Texture

Wednesday, November 19, 2014

Dies R Us Giveaway

I have exciting news to share!  Dies R Us is running a contest.  Here are the details:


Remember - Only comments left on the Dies R Us FACEBOOK page are eligible for a prize!

Tuesday, November 18, 2014

IO Thanksgiving Thanks


Hi friends!  I'm sharing a card similar to my recently posted Christmas card.  I switched out a few of the dies and changed the colors for an entirely different theme.


I used gold embossing powder on the bow to make it look metallic.  This is my first time using this squirrel die, aren't they cute?  They aren't quite as cute eating the pumpkins on my front steps.  

These squirrels were colored with copics and the leaves, pumpkins and Thanks die cuts were colored with distress ink and copics.

Thanks for looking!

Supplies
Impression Obsession Thanks Word

Challenges Entered
Impression Obsession Thanksgiving Wishes
City Crafter Just a Word
Cuttin and Stampin Thanksgiving
Die Cuttin Divas Thanksgiving
Scrap-creations Give Thanks
Cards in Envy Thankful for you

Classy Cards Poinsettia Wreath

I

I love the beautiful Classy Cards 'n Such inspiration photo this week and I had to try my version of the wreath.  I hope you can join in the Christmas Blooms Challenge, the prize is one of my favorite Christmas dies!

I began by cutting Kraft Card Stock using the Impression Obsession Rectangles dies.  It makes such beautiful little layers and the die is all one piece so there's no possibility of misplacing smaller dies. Even though the rectangles were so detailed I felt that the background needed something more.  I cut a piece of Authentique Tradition paper and glued it to the center of the smaller rectangle.  I then added a  piece of red card stock to frame the bigger frame.  Using one of the larger Spellbinders dies from the Matting Basics A set, I cut the center out of the red card stock.

For the wreath, I cut out the twig portion of the Impression Obsession Twig Wreath die with Kraft Card Stock and then sponged distress ink to darken the color a little.  I cut the pine needles which are also part of the Twig Wreath Set from green card stock and then sponged distress ink on the edges to give a more natural appearance.

The Impression Obsession Large Bow was cut both from white and red card stock and layered to add dimension and depth.  I coated the white bow with glue and sprinkled it with glitter so it really shines. The poinsettia's were cut from red card stock and layered and glued together.  Small white pearl's were glued to the centers.

Thanks for visiting!  Use coupon code JENNY-10 to save 10% off your entire order at the Classy Cards 'n Such shop.

Supplies

Challenges Entered
TTCRD
Holly Jolly Christmas Red, Green & White (& kraft)
Get Creative Challenges Glitter
Sparkle n Sprinkle

Tuesday, November 11, 2014

Classy Cards Holiday Floral

hi, this is my card for the Classy Cards 'n Such Ornaments Challenge.  I love this Lydia Ornament die from Memory Box.  The detail is amazing and depending on the colors and how it's positioned, it could be used for more than just Christmas.


I cut the Memory Box Lydia Ornament die with white card stock and then used the die as a stencil to sponge the flowers with distress ink.  I then cut the Memory Box Traditional Ornament out of green card stock and glued to two ornaments together.  The flowers were covered in clear Stickles for sparkle.

The circle was cut out of the green patterned paper with a Spellbinders Standard Circle Large die.  The green paper was then popped up using Joy! Foam pads to add dimension.

The branch was cut from the Memory Box Sprig die.  The "Berries" were colored with distress ink and then painted with clear Stickles.  I added the bow and piece of twine and then the Mother of Pearl Rhinestones for a little glitz.

Thanks for visiting and remember you can save 10% off your entire order at the Classy Cards 'n Such shop using coupon code JENNY-10.

Supplies

Challenges Entered
Creative Card Crew Christmas Joy
Scrap-creations Sparkle
Through The Craft Room Door Anything Goes
Scrapyland

Thursday, November 6, 2014

Classy Cards Tree of Gold

Hi friends!  This week the Classy Cards 'n Such Blog is hosting such a fun new challenge  "Trim the Tree".  I was so inspired by the beautiful tree in the inspiration photo that I wanted to recreate it.  


I cut the Poppystamps Large Flourish Tree out of white card stock, covered it in versamark ink and sprinkled gold embossing powder on top.  I heat embossed it and then repeated my steps to get good coverage with the gold embossing powder.

The poinsettias are from the Poppystamps Small Blooming Poinsettia die.  They were cut out of a beautiful shimmery cream card stock, stacked and glued.  For two of them I didn't use the largest flower because I wanted the flowers small.  After stacking and gluing I tried to spread out the flower layers to give them more dimension.  I also took the little center part and used a bit of Gold Viva Decor Pearl Pen for shine and added color.  They are popped up with Joy! Foam pads.

I glued the tree to the shimmery cream card stock and then used Joy! Foam pads to adhere it to the patterned layer which was also popped up with Joy! Foam Pads.  The green patterned background paper is from the Authentique Tradition stack.  I liked how the paper added another swirl element and a touch of elegance and interest to an otherwise simple card.

Thanks for visiting!  Remember to use my coupon code JENNY-10 to save an extra 10% off your entire purchase at the Classy Cards 'n Such Store.

Supplie List

Saturday, November 1, 2014

Dies R Us Thanks Fall

Hello and welcome to my blog!  I created this card for the new Thankful Challenge starting today at the Dies R Us challenge blog.  Come on over, be inspired and join us for a chance to win a gift voucher to the store.  The DT projects are stunning!


This was my first time using this beautiful Spellbinders die but I think I'll be using it a lot more in future.  It makes it so easy to create an elegant card.  I used a 5.5" square card and cut the die twice using my magnetic spacer plate. I then backed the kraft card with a piece of dark red paper.

I sponged distress ink on the leaf die cuts to get a natural mottled look.  The thanks die cut was covered in versamark ink and sprinked with embossing powder that I heated.  I did this twice so the gold embossing would have nice coverage and really stand out.  


The pink rolled roses were colored with Glimmer Mist, the deep red ones were cut with the same background paper.  These roses have become staples for me as have the Impression Obsession word and greeting dies.  


Supplies
                                           LaLa-Land - Rolled Rose Small Medium Set
                                              Die-Versions Whispers - Old Oak Leaves
Spellbinders Shapeabilities - Gold Elements
Impression obsession Thanks Word
La La Land Rolled Rose Large
Gold fine detail embossing powder
Marianne Design Createables Leaves 

Thanks for visiting!


Challenges Entered
Cards Galore Anything Goes
My Artistic Adventures  Anything Thankful
Sparkles Forum Fall/Autumn Colors
Words 2 Scrap By Gratitude
Sisters of craft Anything Goes
Wags 'n Whiskers Be Thankful