Showing posts with label Nature. Show all posts

Thursday, April 6, 2017

Cheery Lynn Dream


Hello, today I'm sharing a window card.  I was planning a shaker card but with everything going on inside the window I decided to keep it simpler.  It does have a raised plastic window though.
 I cut a circle in the piece of designer paper and sandwiched the plastic between that circle and a piece of thin chipboard in which I cut a smaller circle.  I also cut the Dream word out of the same chipboard before painting it with some new sparks paint.  The mushrooms were backed with white paper and I cut the read tops and mounted them on mushrooms cut out of white.  I added all my elements and adhered the layers together with a strong double sided tape.


Cheery Lynn Dies

I hope you like the result.  Thanks for dropping by the blog today.  
Hugs, Jenny

Friday, July 1, 2016

Dies R Us Going Camping

Hi friends!  I'm back today with an inspiration card for Dies R Us's new challenge Outdoor Fun.  The camping dies are from Cheery Lynn's last release.  This card was created on an A2 card base.  Everything was colored with sponges and distress ink.  The stamped sentiment is from Riley and Co. and reminds me of a friend of mine and fellow scout mom.  I get a kick out of this saying, it's how I'd like to camp too.  

Dies R Us Dies
Cheery Lynn Designs A2 Rectangle (Out of Stock)

Thanks for looking and I hope you can join in the current challenge at the Dies R Us challenge blog for a chance to win a gift card to the Dies R Us store.  Make sure to check out the great sale this weekend too!

Wednesday, June 1, 2016

Dies R Us You're the Best


Hello friends!  I'm sharing a card that's up on the Dies R Us Challenge Blog, which means it's time for a brand new challenge beginning today!  Come and join the fun for a chance to win a gift card to the Dies R Us store (and who doesn't love free dies?).  

I used all Cheery Lynn Designs dies for this card.  I find that they are easy to pair, cut beautifully (even intricate designs) and I LOVE the gorgeous details in so many of the dies.  Check out the lines in the nest and bird wing above.

I colored everything with distress inks, used black paint for the bird's eye and feet and added little droplets of clear glaze on the eggs and fern leaves.  Thanks for looking and make sure to join in the current Birds challenge for a chance to win.  The main Dies R Us Blog and the Challenge Blog have so many gorgeous samples made by my DT teammates.  

Dies R Us Dies
Cheery Lynn Designs You're The Best Sentiment Oval (out of stock)

Tuesday, March 22, 2016

Cheery Lynn Anniversary


Hi!  I'm posting today with a card inspired by the leaf paper I picked out of my stash.  It's a simple card that could easily be made into a shaker.  I cut a green piece of paper to a 5.25" square and glued it to a 5.5" square card.  I then cut the leaf paper to 5", cut a hole in the center with a circle from the Classic Circle Silver Stackers set and adhered it with foam adhesive to the green paper.


I used the birch tree from the Birch Tree with Cute Critters die and tucked the base of the tree into the bottom of the circle.  The rest of the tree I glued down.  I was going to leave the tree completely in the circle but I liked seeing more of the branches.


I cut two little owls from the Birch Tree with Cute Critters die then colored them with distress ink, added googlie eyes, and adhered them with foam tape.  The On Your and Anniversary sentiments were cut and colored with distress ink and then covered in glitter glue.

Cheery Lynn Dies

Thanks for stopping by the blog today and make sure to check out the current Anything Goes challenge for a chance to win a $20 gift certificate to Cheery Lynn Designs. 

Saturday, October 3, 2015

Classy Cards Perfect Refreshment

Hello friends!  Unfortunately my non-crafting world is infringing on my crafting time lately and I need to scale back a little.  I'm sad to say this is my last post for the Classy Cards 'n Such Blog.  It's been a wonderful experience working with such an amazingly talented and supportive design team.  I will miss them all greatly and I know I'll be stopping by the blog daily for wonderful new inspiration.  You can still see a virtual library of my cards on the Classy Cards Blog and can always save 10% off your entire purchase at Classy Cards 'n Such Shop with coupon code JENNY-10.  


I began playing with my new Memory Box Distressed Addington Collage die and this card evolved.  I first cut a piece of Authentique Favorite paper with the Memory Box Distressed Addington die.  I used the die to cut the paper twice, once in the lower right corner and once in the top left.  I tried to layer this on top of an A2 white card but there wasn't enough contrast so instead I glued it to a piece of Kraft paper.  The Kraft panel was then adhered to the card front with Joy Foam Pads.

I cut the Memory Box Quinn Flourish Circle and colored it with distress ink.  The nest and bird were cut using the Memory Box Meadowbird Branch dies.  There's such a nice assortment of foliage in this set.  The Quinn Flourish was also adhered using Joy Foam Pads for additional dimension.  Last I stamped the Impression Obsession Sit in the Shade quote on the front of the card. 

Supplies
Thanks so much for joining me today and for being such wonderful blog followers!  Don't forget to join in Classy Cards 'n Such's challenges for new chances weekly to win a wonderful prize or badge for your blog.  Hugs!

Wednesday, September 2, 2015

Scrapyland Hillside Tag


Hi!  I made this for Scrapyland's new Anything Goes challenge.  I began by coloring the base tag purple with distress ink.  I attempted to get a northern lights effect while blending inks.  I then added the hill with trees.  I played around with colors and almost left all the trees white to create a winter scene but some of the trees in the foreground became a little too dark with the dusting of distress ink I was adding for contrast and I ended up coloring everything.  I added yellow paper behind the houses for lights.

Thanks for stopping by and I hope you can join in the fun of the current challenge!

Scrapyland Supplies
Frantic Stamper Hill With Pine Trees
Frantic Stamper Village Grocery Shoppe

Wednesday, July 1, 2015

Classy Cards Places You'll Go

Hello!  I'm back again today with a card inspired by the new Classy Cards 'n Such Purple Ride Challenge.  I loved the purple bicycle inspiration photo this week and once I found this stamp in my supplies this card just flew together. Don't forget to use my coupon code Jenny-10 to save 10% off your entire purchase at the Classy Cards Store.


I made the bicycle using purple paper and my Memory Box Brand New Bicycle die.  The wheels were cut with white card stock, colored with copics and paper pieced on top of the die cut.  I colored the handlebars and seat with a black copic marker.  

The rest of this card was simple.  I found purple design paper in my stash and cut a center with a Spellbinders Oval die.  I then cut a frame in white with a smaller oval.  The base is a light blue A2 card.  I wanted to use blue so the background would look like a clear sky.

I stamped my Dr. Seuss quote with Black Memento Ink and then adhered the white and purple frame on top using Joy Foam Pads for dimension.  The Poppystamps Weeping Willow Branches were glued on top and the bicycle was also adhered with Joy Foam Pads.  There's more dimension than appears in the photo.  The willow branches were cut twice.  I don't think it's visible but I actually cut a couple of long branches and glued them on the right side of the card to get long branches on that side too.

Classy Cards Supplies

Thanks for visiting and don't forget to link up a card to our new challenge this week for a chance to win a great prize!

Challenge Entered
Poppystamps A Day in the Park

Thursday, May 7, 2015

Cheery Lynn Sending Love


Today I'm sharing a card with a twist on Cheery Lynn's Lots of Layers challenge.  I used the new Step Card Bundle Set-3 to create a garden scene.  


I folded and cut the center of an A2 card instead of cutting the side like in the above piture. That's one of the great things about this die, you can move it around to create the look you want and make entirely different cards.  I used the flowers that come with the set to embellish the card.  Here's a photo from above so you can see how the flowers and grasses were layered.


I cut a piece of patterned paper the same size as an A2 card front and cut it with the main step die.  I glued the patterned paper to the front of  step card and trimmed the sides a little so the patterned paper fit perfectly.  

I cut the flowers and leaves using the flower dies in the set and colored them with distress ink before adding rhinestone centers.  The Sending and Love die cuts were colored to match the roses.  


I cut multiple layers of the Grass Border for the front two layers.  For the tall grass on the back layer I used the Cattails & Reeds die.  The Faerie Mushrooms were colored with distress ink and tucked in between the grasses.  I also cut a white card stock backing to layer behind the mushroom tops.


Last I added the sweet hummingbird and dragonfly dies from the Tiny Things With Wings die and added clear stickles to the dragonfly wings and roses for sparkle.  

Cheery Lynn Dies

Thanks for visiting and be sure to check out this week's Lots of Layers challenge for a chance to win $20 towards shopping  at Cheery Lynn Designs!

Challenges Entered
Double Click For a Mom or Girl
Scrapyland #17 Anything Goes
Fab 'n Funky May Flowers
Simon Says Stamp  Let's Get Sentimental
Shopping Our Stash #200 Big, Bold, Beautiful
ttcrd Anything Goes
The Paper Girls Cute Critters (the dragonflies and hummingbird)

Wednesday, April 22, 2015

Classy Cards Cherry Blossoms

Hi friends!  Today I'm sharing a card inspired by the new Classy Cards 'n Such "Cherry Blossoms & Dogwoods" Challenge.  This challenge had me stumped until I realized that I could turn almost any little flower into a cherry blossom!  Don't forget to use my coupon JENNY-10 to save 10% off your next order at Classy Cards 'n Such. 


I created the central image using the Memory Box Meadowbird Branch die set.  I cut the branches twice out of brown, white and green card stock.  The flowers are from a tiny flower die in my stash and I used a stylus from the McGill Paper Blossoms Tool Kit to shape them.  I cut the bird and colored him with distress ink.

The arrangement was glued to two Spellbinders Circles and they were popped up using Joy! Foam Pads for dimension. I glued them to the Poppystamps Claudette Frame which was adhere to a layer of Botanical Tea design paper.  I layered that onto a square of white card stock and then glued the entire sandwich to a 5.5" square blue card.


Last I added a Poppystamps Butterfly that was covered in fine glitter and backed with a pink Poppystamps Cheviot Butterfly and added three pink Dew Drops to the bottom corner.

Supplies
Poppystamps Cheviot Butterfly
Poppystamps Delaney Butterfly
Cloud Nine Velvet Microfine Glitter

Thanks for visiting and I hope you can join the new Classy Cards 'n Such Challenge this week for a chance to win a great prize!  You can even link up below.  


Challenge Entered:
Poppystamps Challenge Spring Fever


Thursday, April 2, 2015

Cheery Lynn Happy Birthday

Hi, today I'm sharing my very first post for Cheery Lynn Designs!  I tend to gravitate to using pinks, blues and greens on cards so I thought I'd try to mix things up a bit and use yellows and oranges.


I created the background by cutting the Princess Window from white card stock and gluing a slightly smaller piece of patterned paper to the back.  The window was adhered with foam adhesive to a another patterned paper cut with the largest Horizon Square Boutique Stacker Frame, and then backed by a gray 5.5" square card.

The orange Large Roses and yellow Cuties 3 flowers were colored with glimmer mists, shaped with paper shaping tools and glued with score-tape to the Princess Frame.  I tucked leaves and flowers from the Flourish Leaf Strip and Dandelions into the arrangement and added the distress ink colored mushrooms underneath.


I cut the Small Exotic Butterfly 2 with blue patterned paper and darkened the edges with distress ink. Happy Birthday was glued to the top of the Sentiment Tag 2 which was then popped up with foam adhesive.

Thanks for visiting today and be sure to check out this week's Back to Nature Challenge for a chance to win a $20 shopping spree to the Cheery Lynn Designs shop!

Cheery Lynn Dies
Sentiment Tag 2 -B425

Challenges Entered
Card Mania Flowers
TTCRD Anything Goes

Wednesday, April 1, 2015

Classy Cards Spring Scene

Hi, I'm posting today with a card for the current Classy Cards 'n Such Bunnies Rule challenge.  I created a scene with some of my new dies and I hope you like the result.


I die cut the baskets and colored them with a Mini Ink Blending Tool and distress ink.  Multiple layers of grasses were cut and colored and the baskets were nestled into the grass.  I used Joy Foam Pads to add dimension between the grass layers.


I die cut and colored the bunnies and used Joy! Foam Pads to adhere them in between the grasses.  The chicks were cut, sponged with ink and situated in the basket.  Black dots for eyes were added on both the chicks and bunnies.

For the tree branch I cut the  Impression Obsession Leafy Branch die twice, colored with distress ink and layered both together.  The bottom branch was glued down tightly but only the branches of the top layer were glued so the leaves could be turned for added dimension.

I blended distress ink over the background with a blending tool before gluing the clouds, making sure the clouds overhung the edges for a more natural looking scene.  The flowers were shaped with a stylus from McGill's Paper Blossoms Tool Kit and tiny rhinestones were glued to the centers for sparkle.

The last addition was the little fence which may be retired.  Classy Card 'n Such carries a similar die the Poppystamps Country Fence.

Thanks for visiting and remember you can save 10% off your entire order at the Classy Cards 'n Such shop using coupon code JENNY-10.

Classy Cards Supplies
Classy Cards Substitution Dies

An InLinkz Link-up

Challenges Entered:
Dream Factory Chicken Run/Easter Bunny
TTCRD Anything Goes

Saturday, March 14, 2015

Classy Cards Bee Friends

Hi, I'm posting today with a new Classy Cards 'n Such DT card I made using the new Memory Box Open Studio Busy as a Bee die.  These Open Studio dies coordinate so nicely and to keep the design CAS I didn't use other dies.


I first cut the honeycomb strip out of white card stock and colored it black with Black Soot Distress Ink.  While the honeycomb was drying I cut the little swirl design out of the card stock. I added a piece of yellow paper behind the white and then glued the honeycomb back into the negative space.  

The bee was cut twice, once out of black paper and once out of yellow.  The yellow bee body body was brushed with Twinkling H20's for a little shimmer.  I assembled and glued the bee together and then added Joy Foam Pads to adhere him to the paper.  

The sentiment is from the Justrite Vintage Labels Two stamp set.  After stamping the friends sentiment, I layered the main panel onto black card stock and then onto an A2 card. For a little added bling I glued three black rhinestones to the top corner and also glued tiny yellow rhinestones to the bee's antennae.

Thanks for visiting!  Remember to use my code JENNY-10 to save an extra 10% off your entire purchase.

Supplies

Saturday, March 7, 2015

Classy Cards Name Frame

Hi,  this is posting today over at the Classy Cards 'n Such Blog. I've made Jungle and Princess themed name frames for my younger children but not for my oldest.  He is bridging to Boy Scouts soon and I thought it was time to finally make him one.


I began with a 7.5" square of light blue paper.  The frame is 8"square.  I cut the letters with a die from my stash out of brown paper and then added distress ink with my Mini Ink blending tool to make them look a little dirtier.    I also added a clear glaze to the top of the letters so they'd have a more substantial "feel".  

I mounted the blue layer onto a larger sheet of green card stock with Joy Foam Pads.  The green layer was then backed with brown card stock to pick up the color from the letters.  I added the white mountains popping them up with Joy Foam Pads and then added the main Kraft foreground panel also adhering it with Foam Pads.  I distressed the Kraft card stock with green distress ink and a Mini Blending Tool.


The Impression Obsession Fir Trees were cut from dark gray-green card stock and grouped to create the background.  The ones in the foreground were adhered with foam pads for dimension.  The smaller Impression Obsession Evergreen Trees are darker green.

The Poppystamps Fireplace Logs and Poppystamps Warm and Cozy Fire die cuts were colored with distress ink.  The fire is popped higher with foam pads too.  I added a little gold paint to the edges of the fire for visual dimension and shine.  Last I adhered a tent die cut from my stash with Joy Foam Pads.


Supplies

Thanks for visiting and I hope this will inspire you to try to create a name frame of your own.  Remember to use my coupon code JENNY-10 to save an extra 10% off your entire purchase at the Classy Cards 'n Such Store.

Wednesday, February 11, 2015

Classy Cards Blue Bird

Hi Everyone, I'm posting with a card for the Classy Cards 'n Such's new Thoughtful Challenge.  I have a nice collection of bird stamps and dies but I haven't used this pretty stamp yet (although I've used others in the set) so I focused the card around it.


I stamped the Inky Antics Bird Bath and Feeder stamp in Memento Tuxedo Black ink and then colored with Copics.  I cut the image using Spellbinders Oval Bliss die.  The die was used as a stencil to add green distress ink to the edges.  I backed the oval with a bright blue piece of card stock cut with Spellbinders A2 Filigree Delight die to make the card more vibrant like the inspiration photo.

I cut a piece of lovely pink design paper from the Simple Stories Vintage Bliss paper pad behind the blue to also pick up the pink flowers in the photo.

The oval was popped up higher with Joy Foam Pads.  I cut the Thinking of you words from the  Impression Obsession Greeting Set with white card stock.

Last I had to cover up a bit of extra ink that ended up on the image after one of my children left a sponge dauber on top of my card, so I added a flower made from the new Heartfelt Creations Botanical Wings die.  I cut it out of the scraps from the Vintage Bliss background paper.   I inked the edges with Worn Lipstick distress ink, shaped the petals with my Paper Blossoms Tool Kit and Molding Mat and added a sparkly Rock Candy Center and a bit of Wink of Stella for sparkle.

Thanks for looking and I hope you can play along this week!


Supplies

Saturday, November 1, 2014

Dies R Us Thanks Fall

Hello and welcome to my blog!  I created this card for the new Thankful Challenge starting today at the Dies R Us challenge blog.  Come on over, be inspired and join us for a chance to win a gift voucher to the store.  The DT projects are stunning!


This was my first time using this beautiful Spellbinders die but I think I'll be using it a lot more in future.  It makes it so easy to create an elegant card.  I used a 5.5" square card and cut the die twice using my magnetic spacer plate. I then backed the kraft card with a piece of dark red paper.

I sponged distress ink on the leaf die cuts to get a natural mottled look.  The thanks die cut was covered in versamark ink and sprinked with embossing powder that I heated.  I did this twice so the gold embossing would have nice coverage and really stand out.  


The pink rolled roses were colored with Glimmer Mist, the deep red ones were cut with the same background paper.  These roses have become staples for me as have the Impression Obsession word and greeting dies.  


Supplies
                                           LaLa-Land - Rolled Rose Small Medium Set
                                              Die-Versions Whispers - Old Oak Leaves
Spellbinders Shapeabilities - Gold Elements
Impression obsession Thanks Word
La La Land Rolled Rose Large
Gold fine detail embossing powder
Marianne Design Createables Leaves 

Thanks for visiting!


Challenges Entered
Cards Galore Anything Goes
My Artistic Adventures  Anything Thankful
Sparkles Forum Fall/Autumn Colors
Words 2 Scrap By Gratitude
Sisters of craft Anything Goes
Wags 'n Whiskers Be Thankful

Wednesday, October 22, 2014

Classy Cards Hello Fall

I designed this for the latest challenge at Classy Cards.   Hope you can join in the colors of fall challenge.  I began this card by looking through my card stock.  I was so inspired by the plaids in the inspiration photo.

I found this pretty plaid paper in the Simple Stories Vintage Bliss paper pack.  I cut out a rectangle of the paper using Spellbinders Matting Basics A set.  The center oval was cut out with the largest Spellbinders Classic Ovals Large.  

I matted then matted the plaid paper onto a rectangle of green card stock which was also cut out of the Spellbinders Matting Basics A set.  The center of the green paper was cut with the largest oval in the Spellbinders Classic Ovals Small set.  I stamped the Stacy Stamps The Woods stamp using Memento Brown ink and then colored it in with a Copic E31 marker.  

The leaves from the Impression Obsession Small leaf set were sponged with distress ink to give them a natural appearance.  I cut the Hello out of the new Impression Obsession Greetings set and also dabbed distress ink over the die cut.  I love these greetings dies, they are so versatile.  

Before I put everything together I popped the Vintage Bliss card stock up using foam dots to add dimension.  I glued the green paper to the white card base, added a bow out of ribbon from my stash and then glued Impression Obsession Leaves around it.  I decided the card needed something extra so I sponged distress ink over the white base layer and the edges of the Vintage Bliss paper to add some visual texture.  Thanks for looking and I can't wait to see what you make for this challenge!

Tuesday, June 24, 2014

Magnolia Robin Hood


Supplies
Magnolia Edwin Stamp
Spellbinders Decorative Labels 34
Corner Rounder Punch
Cheery Lynn Pair of Ferns
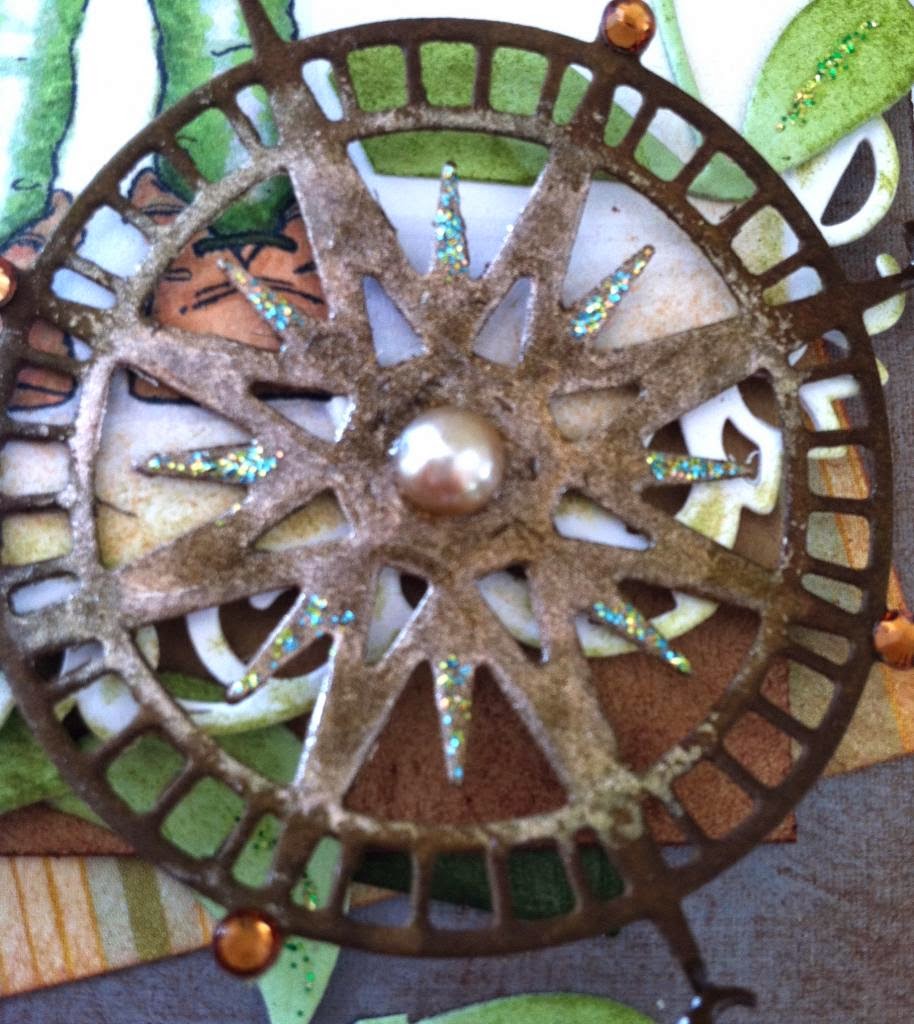
Cheery Lynn Ship's Compass
Copics, TH Distress Ink, Stickles, Flat-back Pearl, Rhinestones, Judikins Color Dusters

Challenges Entered
Marvelous Magnolia Use Punches
Crafting from the Heart Anything Goes

Tuesday, April 1, 2014

Butterfly Trellis


Hi!  I don't often use Green as a dominant color in cards so this week's Impression Obession challenge was quite challenging for me.

 I colored the trellis die cut with distress ink.  I also used more distress ink to "age" the dark green panel behind the trellis. I used a distressing tool to rough up the edges of the green cardstock too and then ran more distress ink over the sides.  The flowers were cut from the Hydrangea die and then brushed with Wink of Stella brush for an added soft shimmer.  The vines were colored with copics.  Thanks for looking!


Supplies
Impression Obsession Trellis (DIE037-V)
Impression Obsession Hydrangea (DIE044-Y)
Impression Obsession Vine (DIE051-B)
Impression Obsession Butterflies (DIE046-A)
Spellbinders A2 Curved Matting Basics
Cuttlebug embossing folder Swiss dots
Stampin' Up embossing folder -
Distress Ink, Copics, Wink of Stella brush, Ribbon, Pearls

Challenges Entered
City Crafter Spring
Allsorts #252 Use those dies
A Creative Romance Spring Flowers
The Rubber Buggy Spring Flowers

Tuesday, March 11, 2014

IO Flowering Tree


I love Impression Obsession dies - especially those Spiral Flowers! I also find myself using the leafy branch die on everything lately. 

First, I cut the tree and colored it with my Copic markers.  I then cut leaves from the leafy branch die, colored them with Copics and glued them onto the tree.  I cut more branches in blue and weaved them into the grass. I liked the added pop of color of the blue leaves behind the orange roses. The peachy-orange roses and yellow flowers were created using the Spiral Flowers die and were colored with distress ink.

For the yellow flowers I only used half of the tiny rolled daisy die. After the yellow distress ink dried, I cut the daisy die cut in half before rolling it. I used both halves of the die cut. It thinned the flowers out a little and made them a little smaller.  The flowers are small but I was afraid of overpowering the tree.  It may be difficult to see but I used flower soft in small spots on the branches to emulate buds.

Materials Used
Impression Obsession Leafy Branch 
Impression Obsession Grass
Impression Obsession Bare Tree
Impression Obsession Spiral Flowers
Spellbinders Labels 8
Spellbinders Labels
Distress Ink, Copic Markers, Square Brads